How to Turn Off Clutter in Outlook / Office 365
Clutter is a mailbox management feature of Office 365 for Business. (If you don’t have an Office 365 for Business subscription, you will not have this feature.)
It analyzes how you process your email and then moves “unimportant” or low-priority email from your Inbox into a special folder, to save you the time of doing this yourself. Essentially, it sorts emails it thinks you will already ignore into a secondary Inbox. If you already have an email spam protection tool running, Clutter may be overkill. If you’re tired of fishing emails out of the special folder or forgetting to check it entirely, you can turn it off. Here’s how!
Clutter in Outlook 2016
If you’re using Outlook 2016, you can quickly jump to the relevant Office 365 settings from your desktop version by following these instructions.
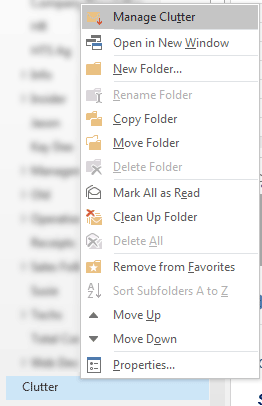
- In desktop Outlook, right-click on the Clutter folder and choose “Manage Clutter”.
- A browser window will now open, prompting you to login into Office 365 if you aren’t already.
- After logging in, you will be taken to the Clutter settings page.
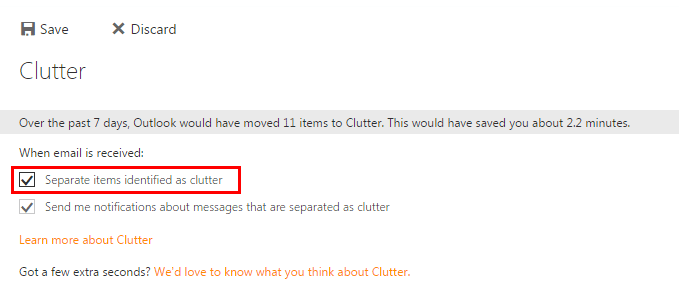
- Uncheck “Separate items identified as clutter”.
- Click the Save button at the top.
If these instructions don’t work because “Manage Clutter” is not an option, use the Office 365 instructions below.
Clutter in Office 365
If you’re already in Outlook.com, follow these instructions
to turn off Clutter in the Office 365 settings.
- Go to Settings by clicking on the Gear icon in the upper right.
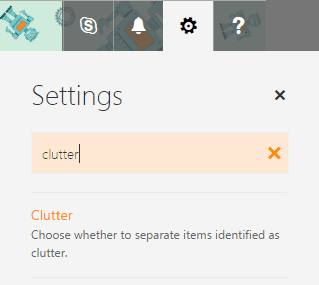
- Search for “Clutter” and select the option when it appears.
- Uncheck “Separate items identified as clutter”.
- Click the Save button at the top.
And that’s that! You turned the sorting off. You no longer have to worry about incorrectly sorted emails or having to check yet another folder for incoming mail you missed.


